Guide
Provision your app
Provisioning connects your application to Banglalink with the right configuration for each API it uses. In this walkthrough all four configurable APIs are selected, so steps 6 to 16 set up SMS, USSD, Subscription and CaaS in turn.
17 steps · Screenshots from the AppLink platform
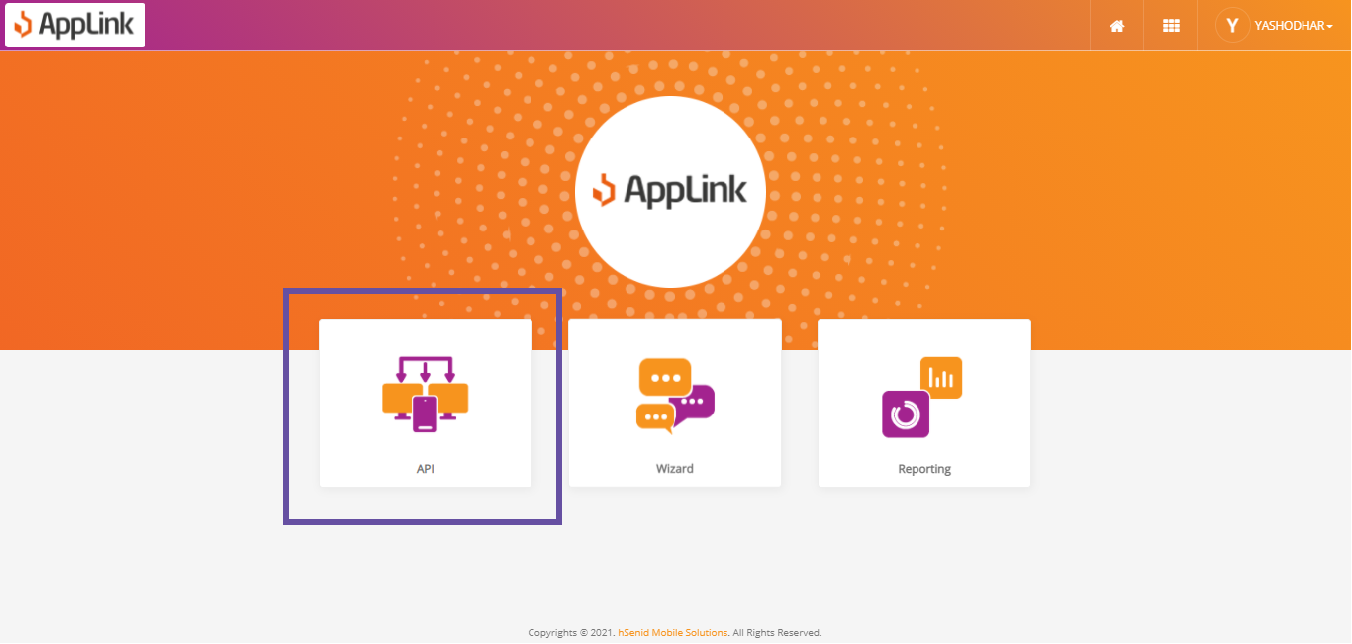
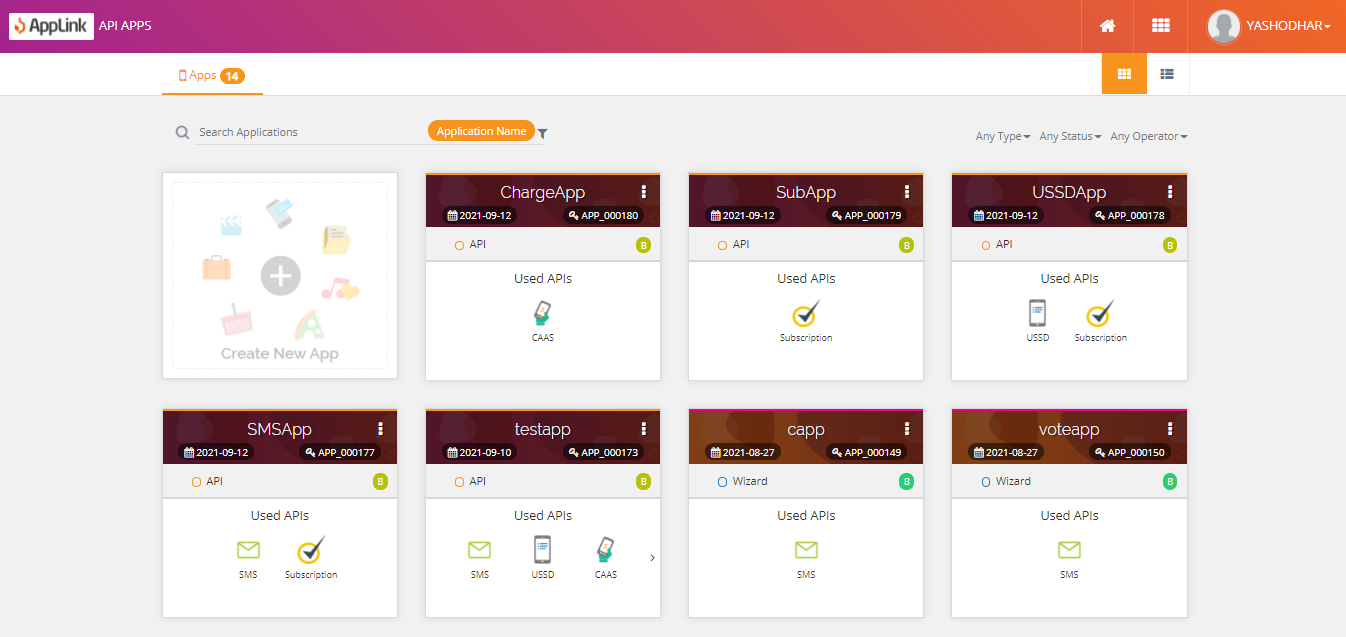
Step 1: Select the API option from the dashboard.
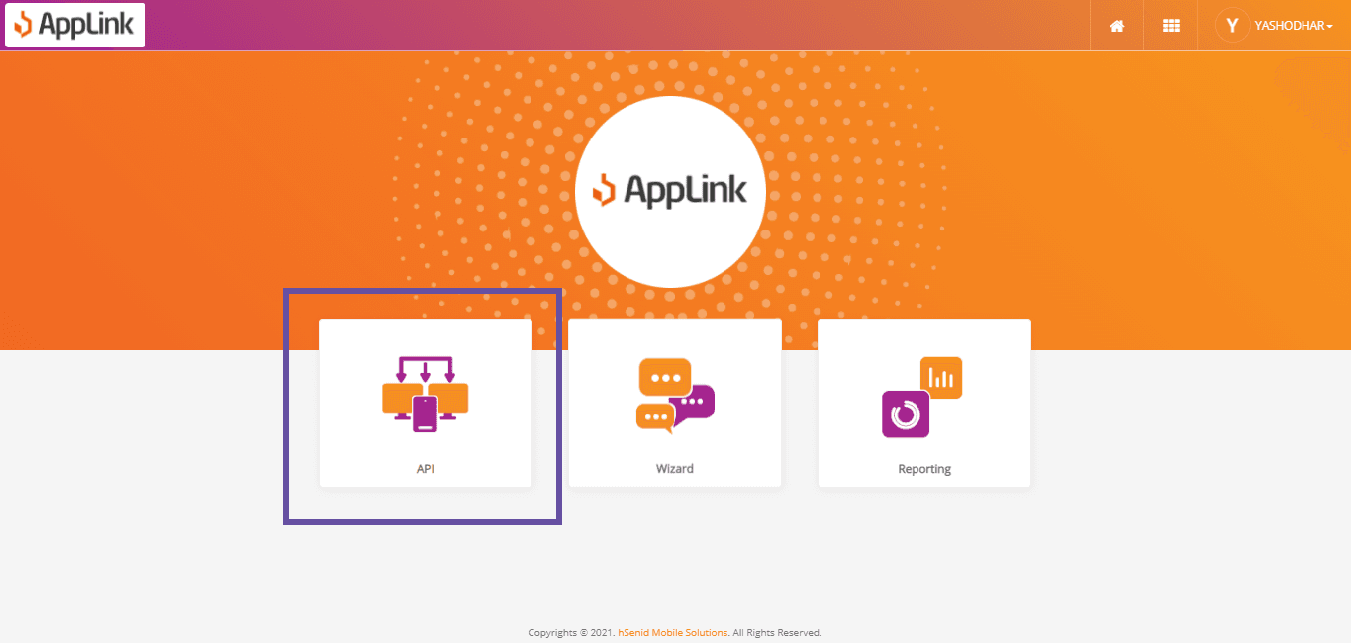
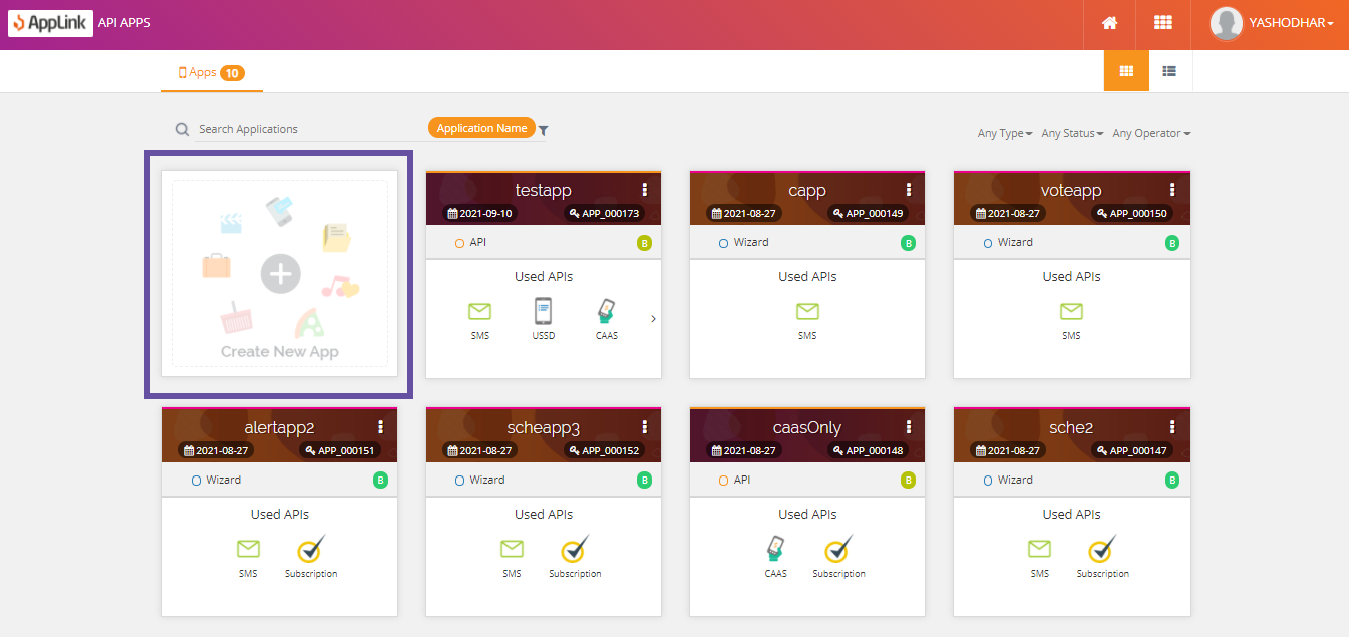
Step 2: Click Create New App.
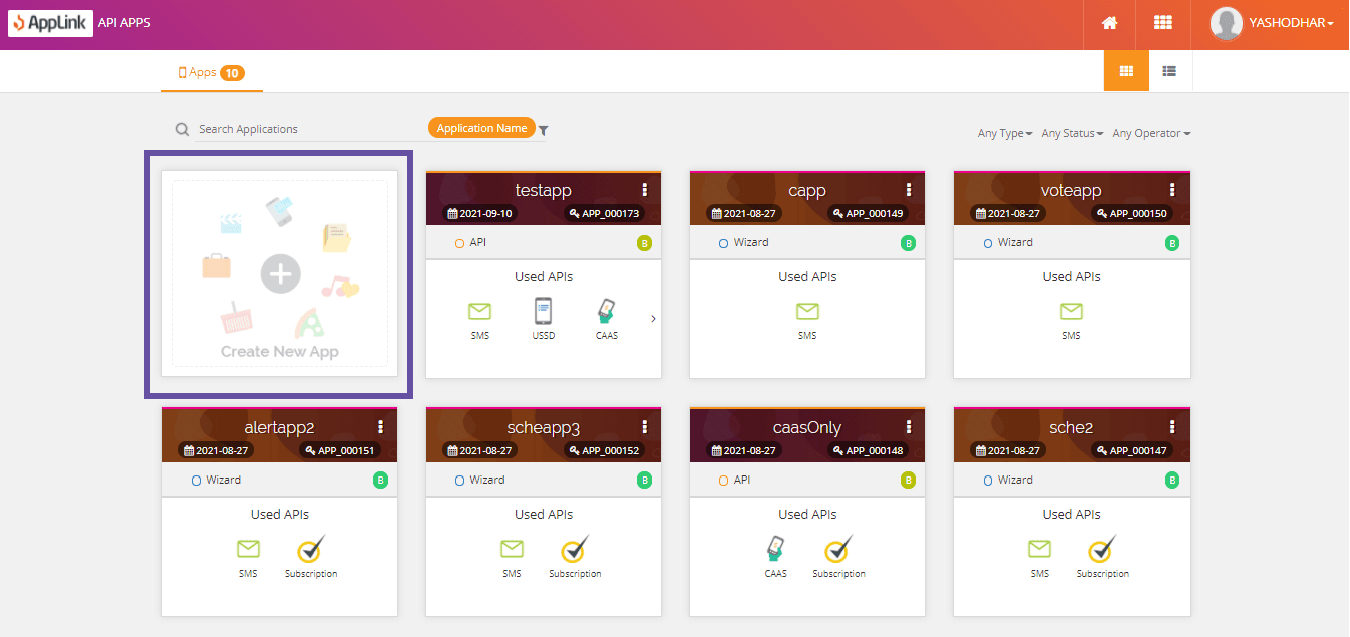
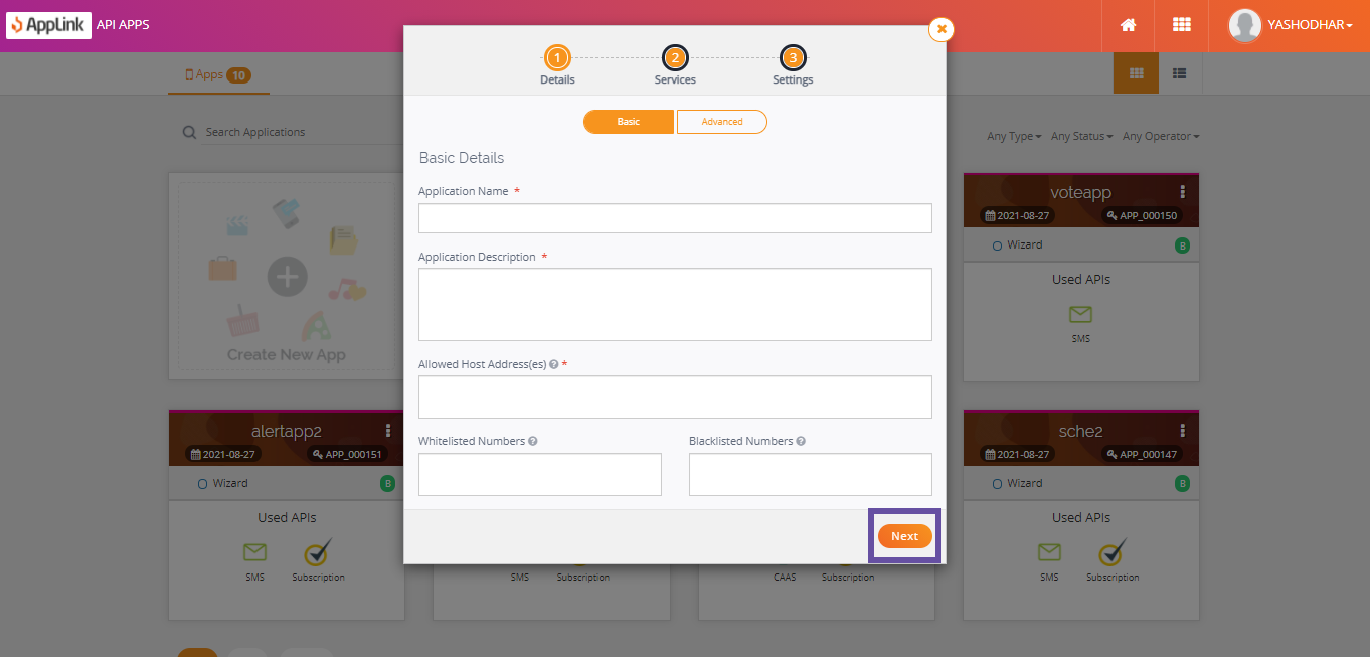
Step 3: Fill in the basic application details and click Next.
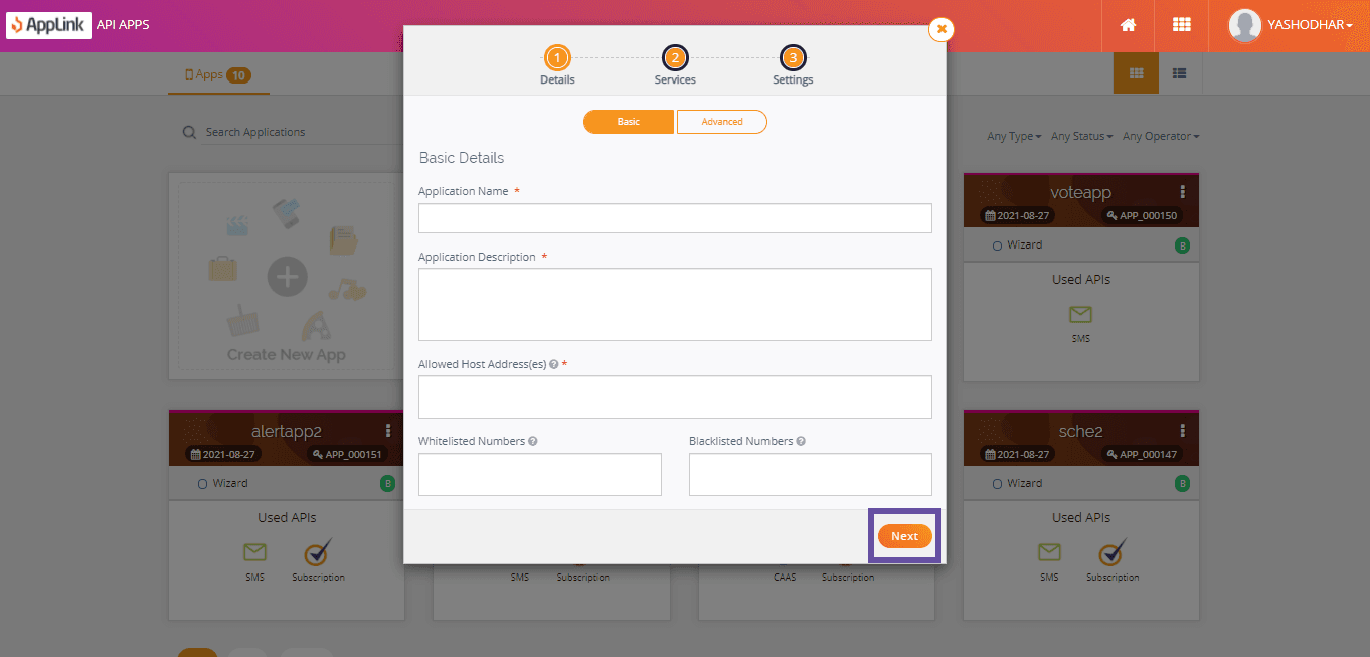
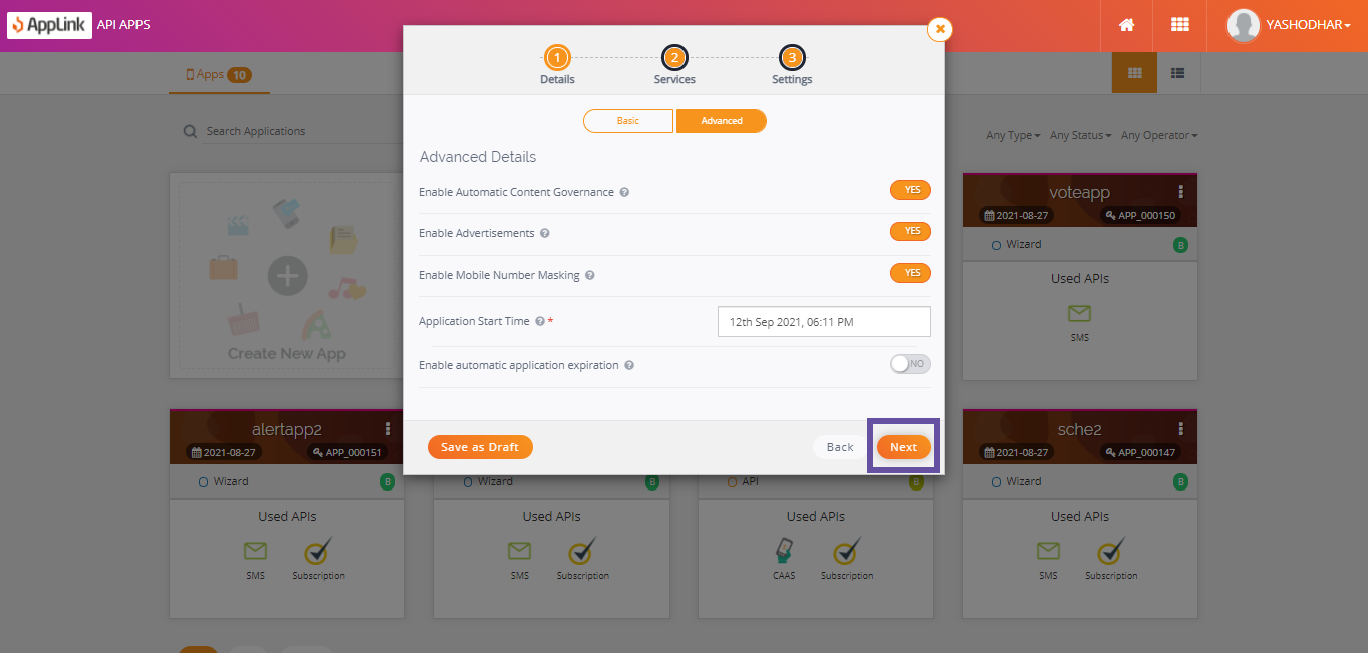
Step 4: Fill in the advanced application details and click Next.
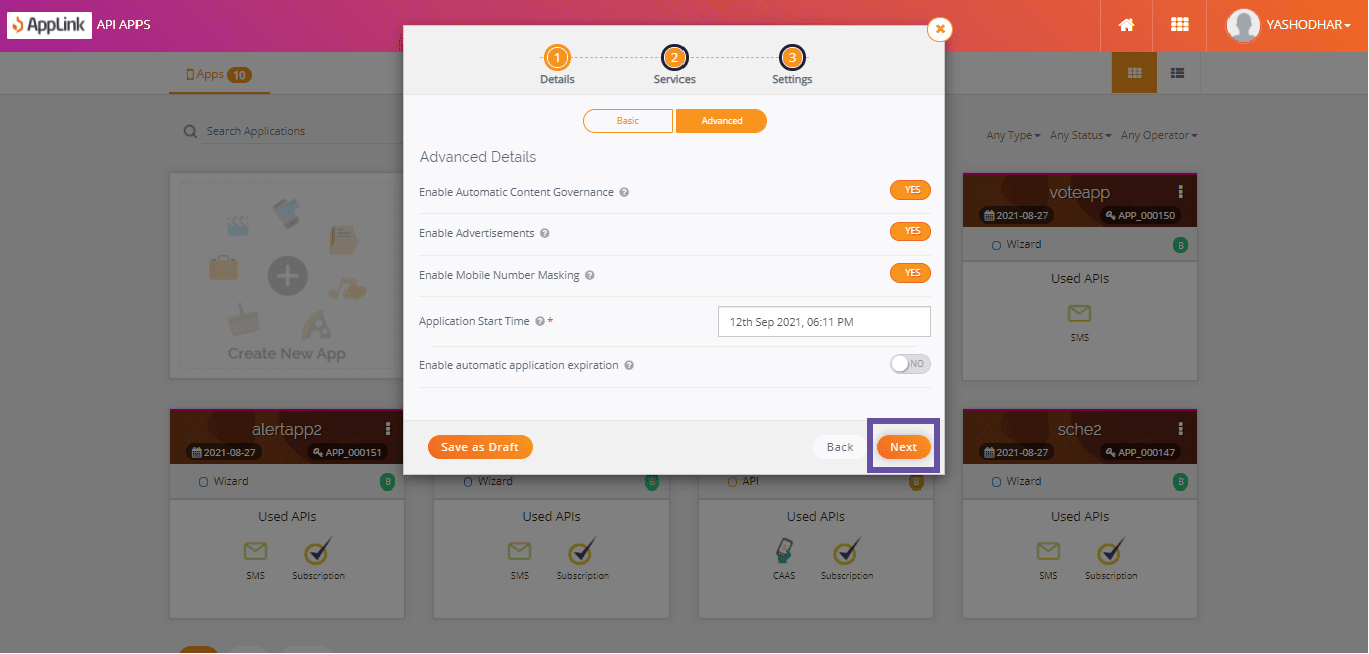
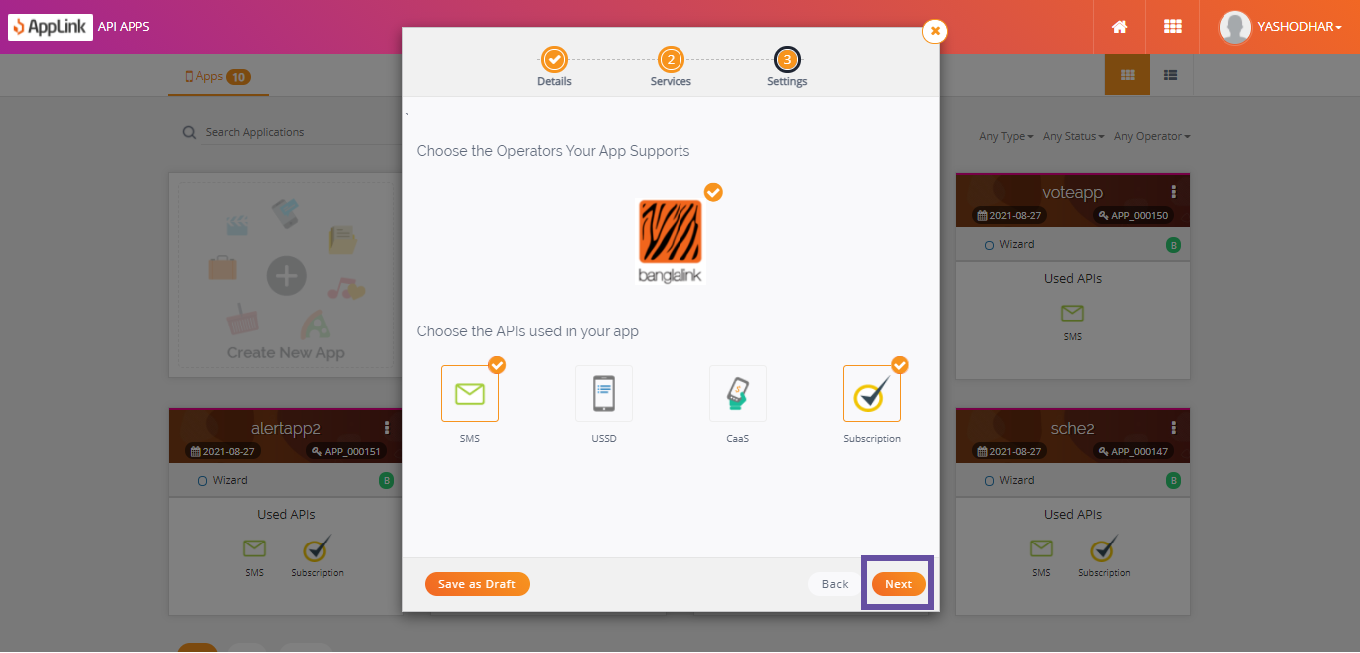
Step 5: Select the APIs your application will use and click Next.
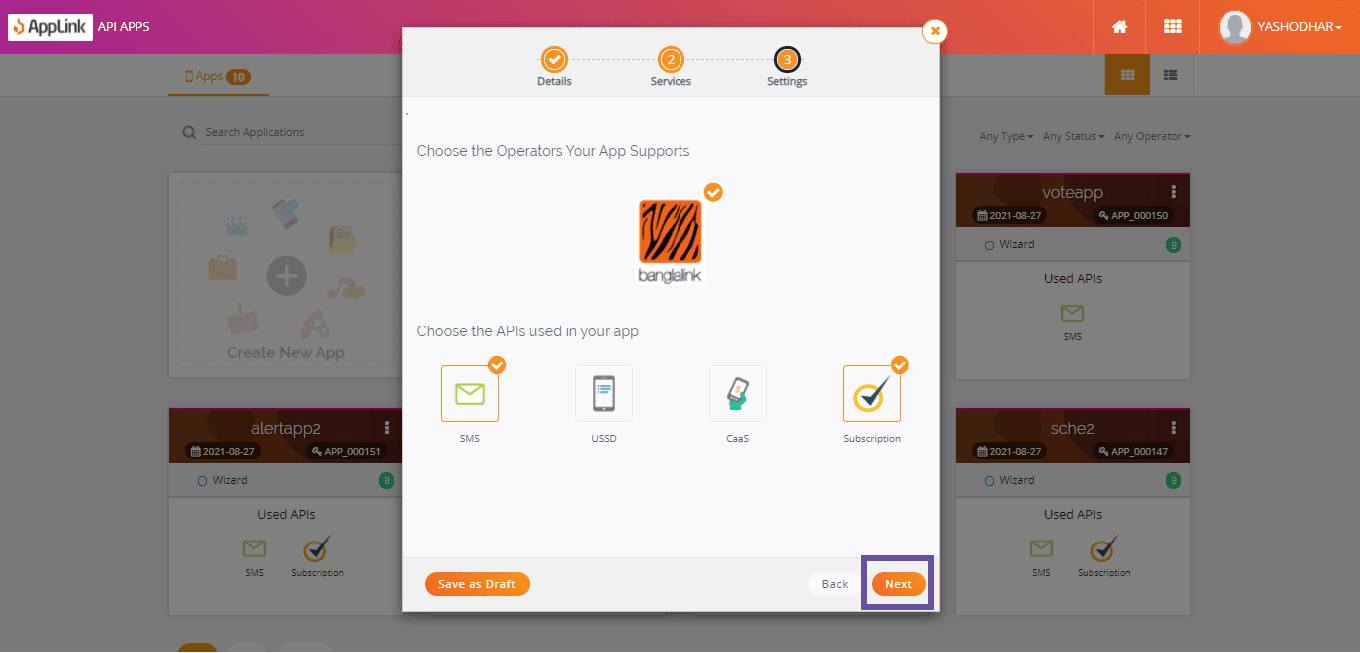
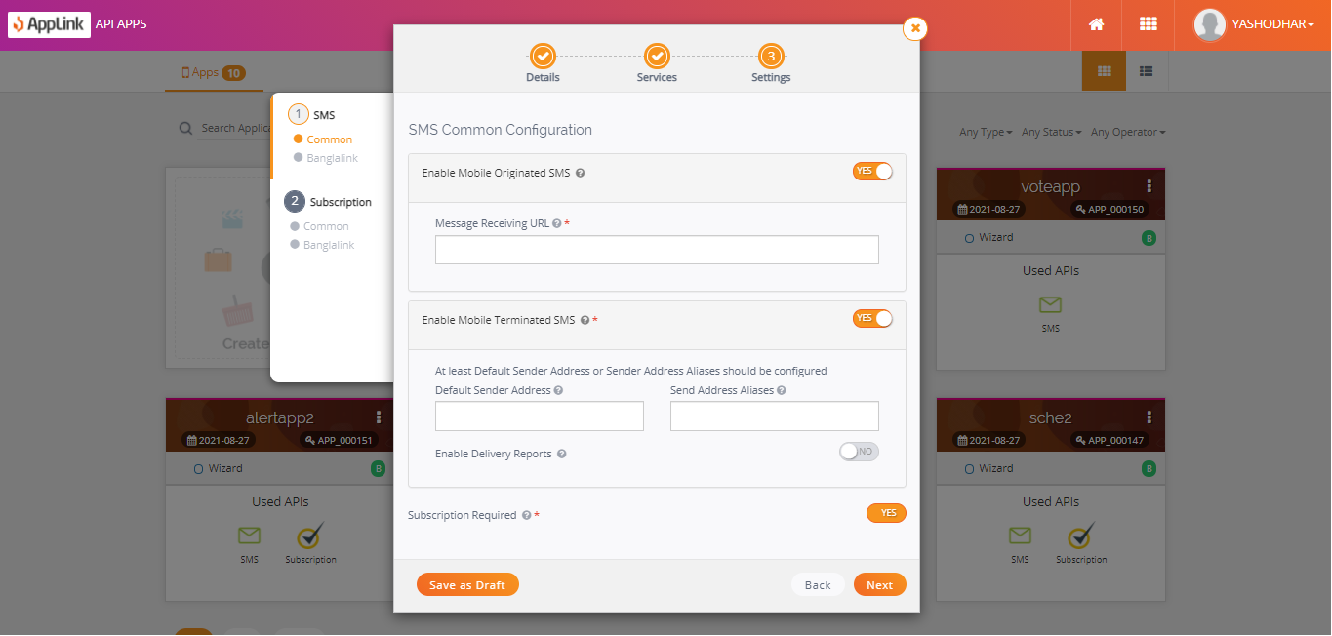
Step 6: Fill in the SMS common configuration details and click Next.
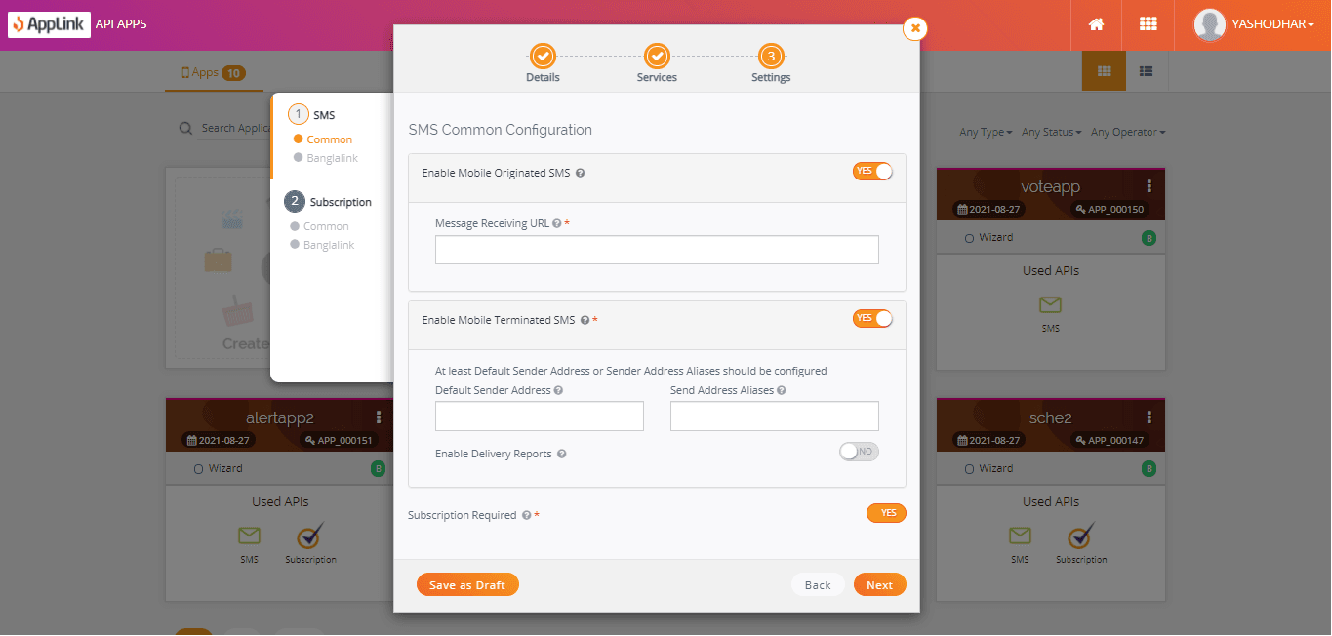
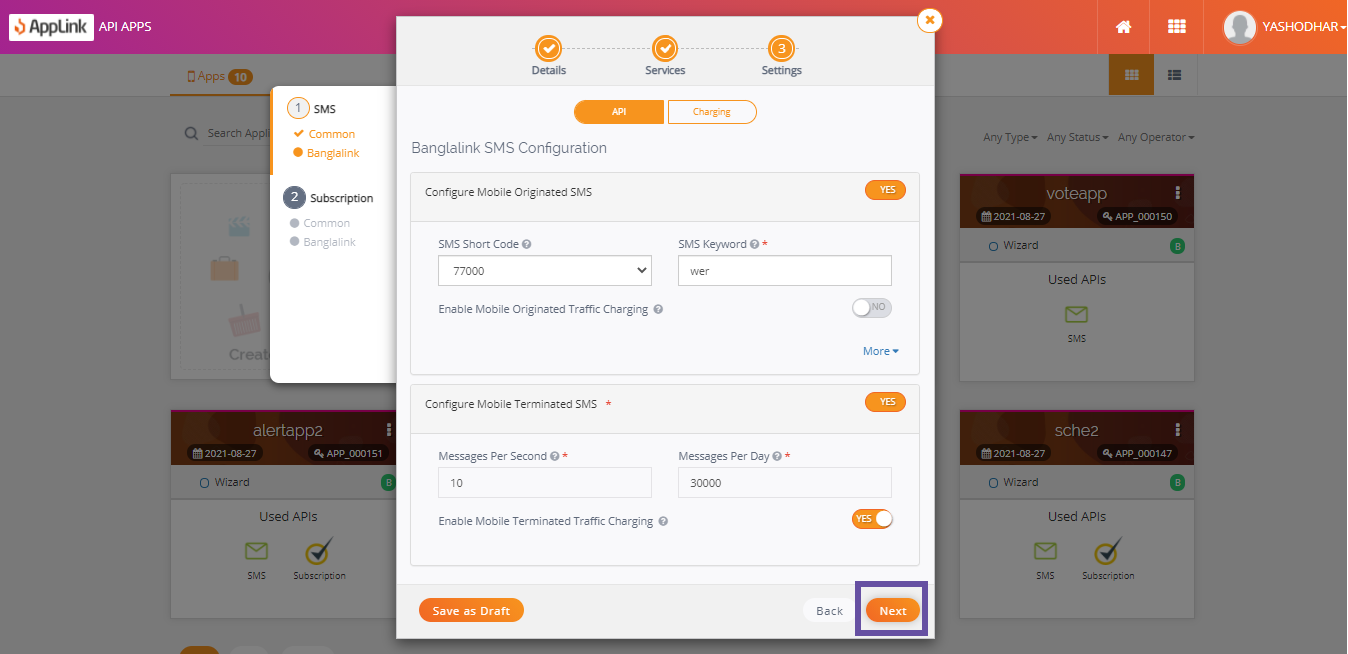
Step 7: Fill in the SMS configuration details and click Next.
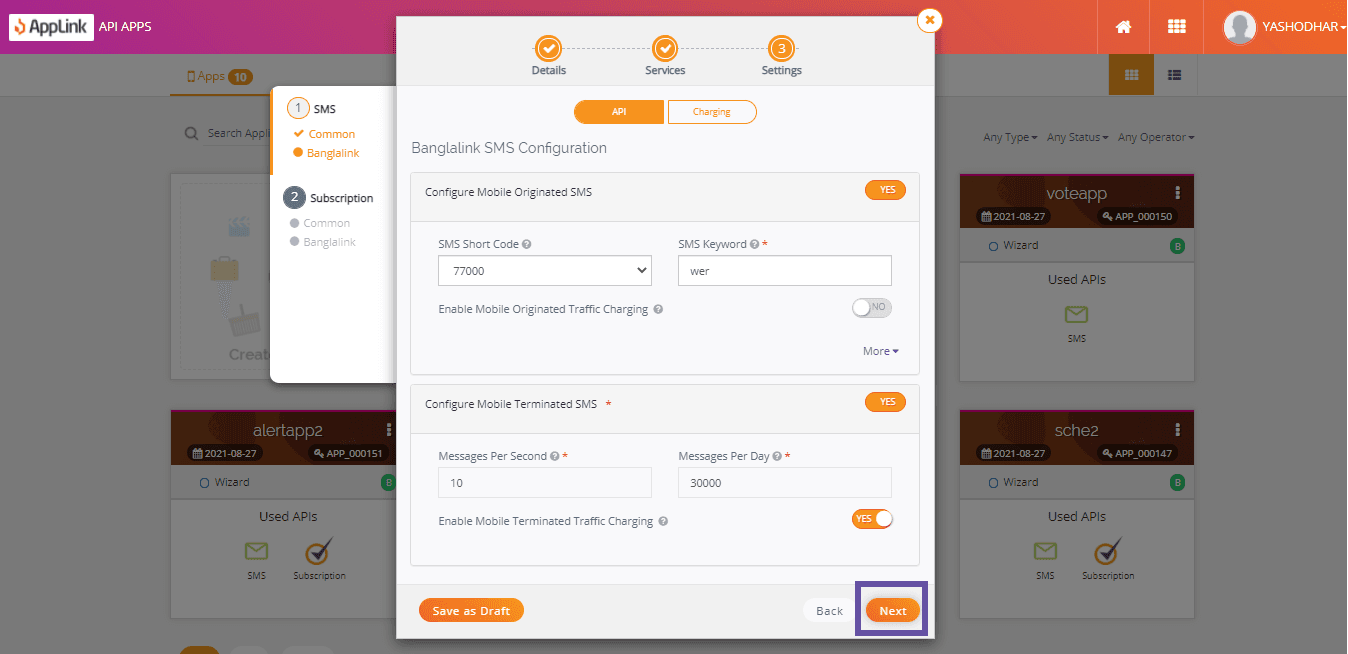
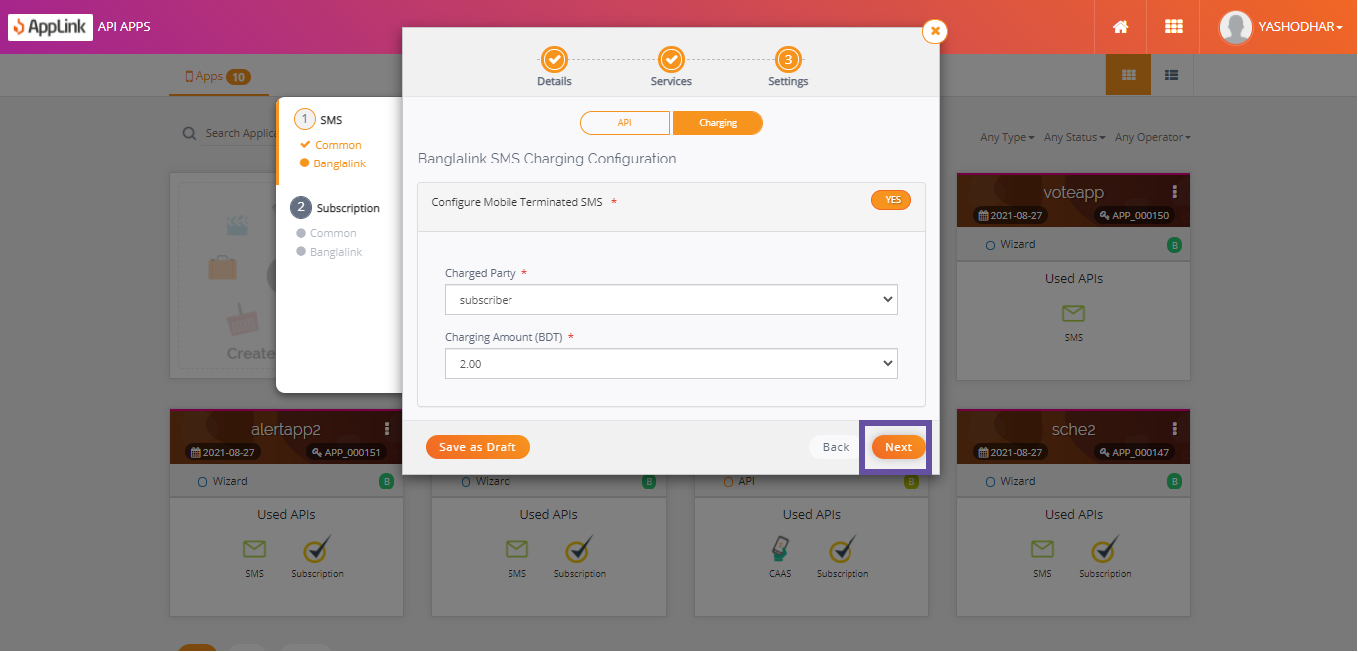
Step 8: Fill in the SMS charging details and click Next.
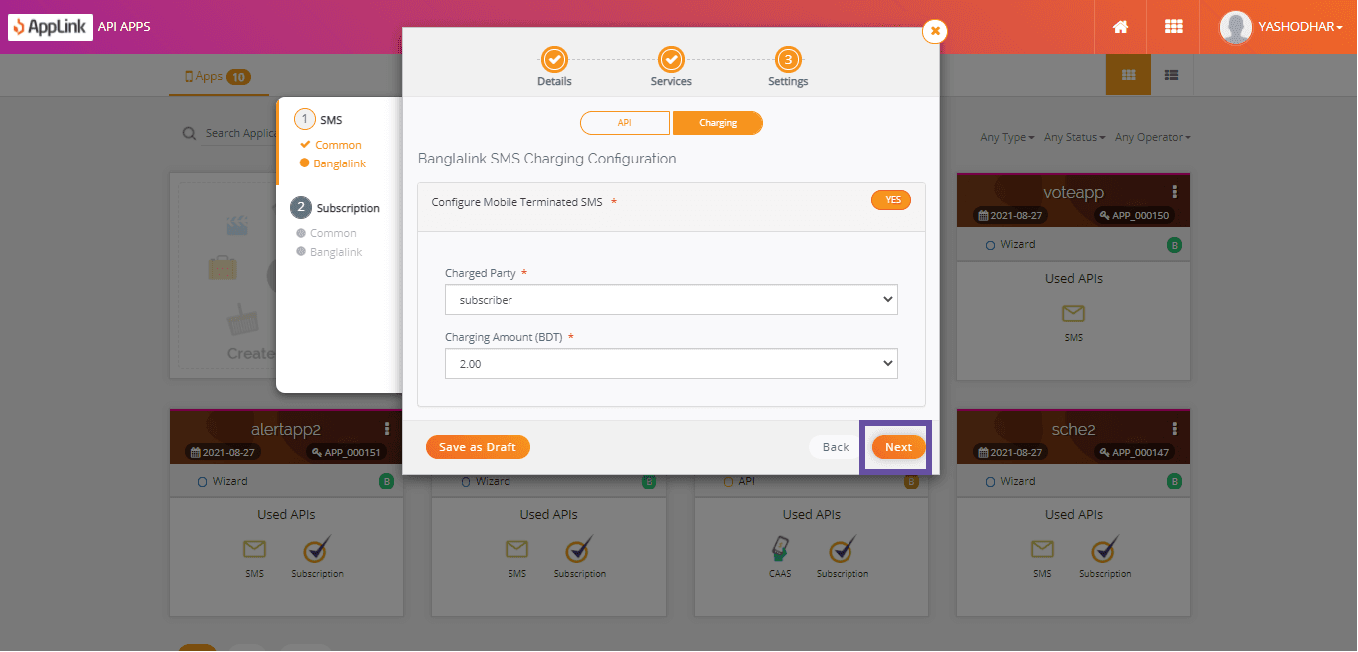
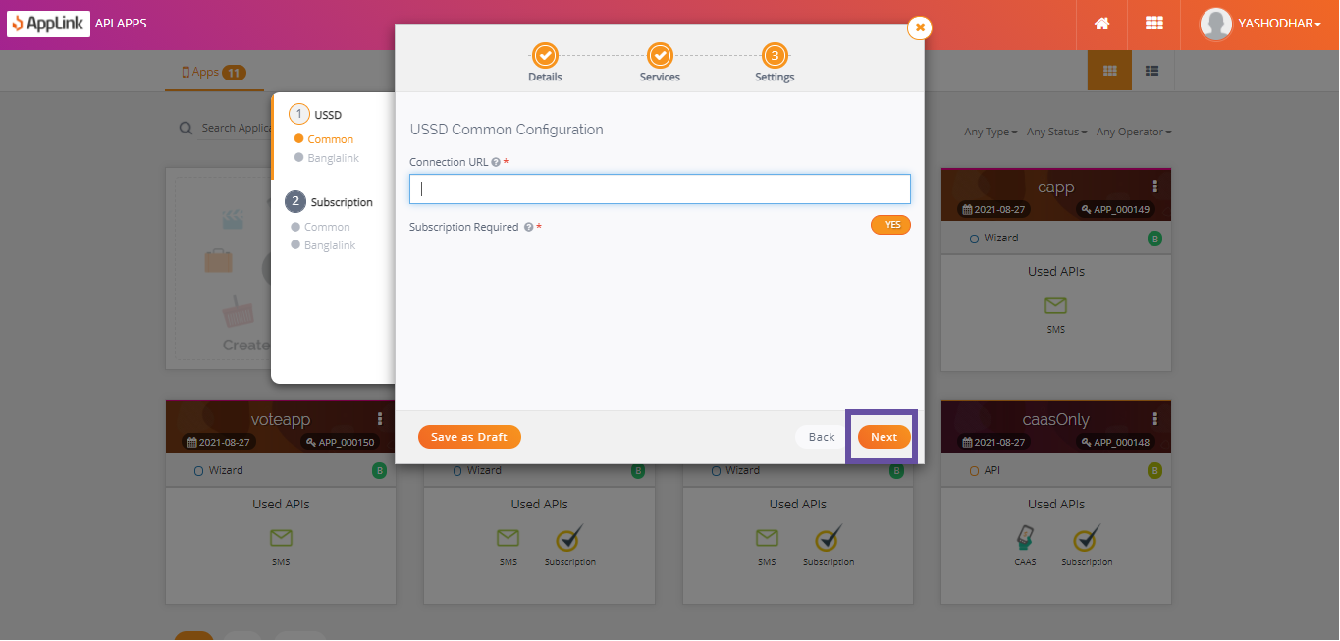
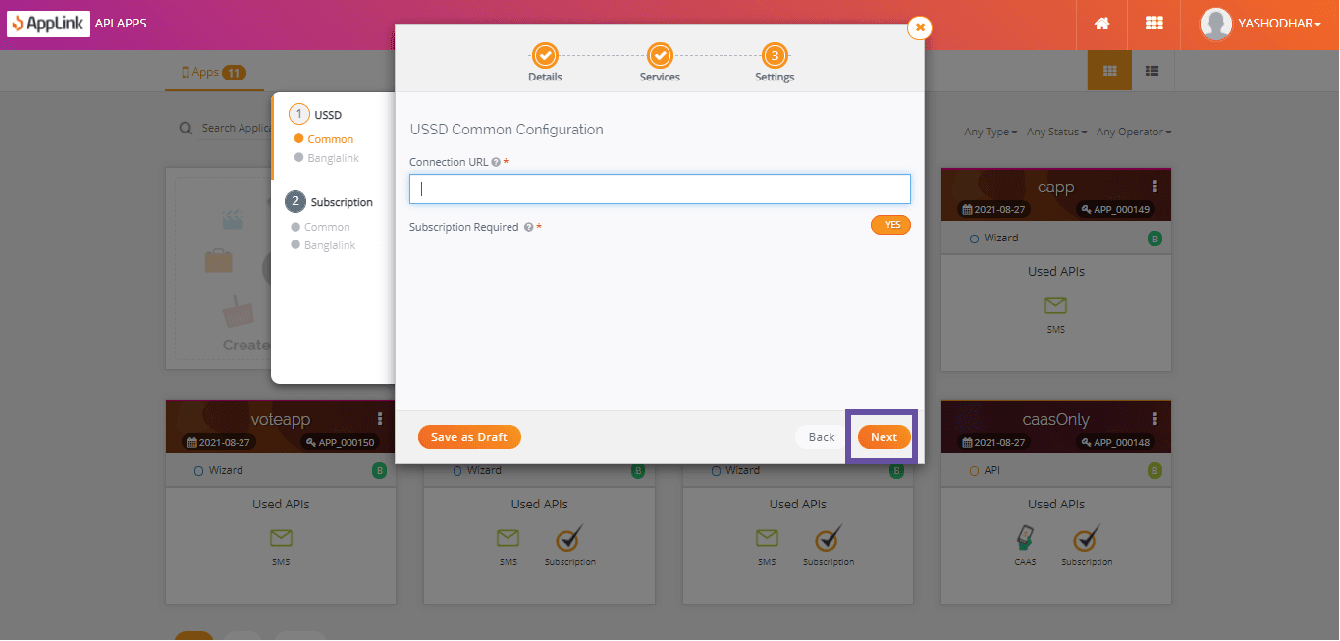
Step 9: Fill in the USSD common configuration details and click Next.
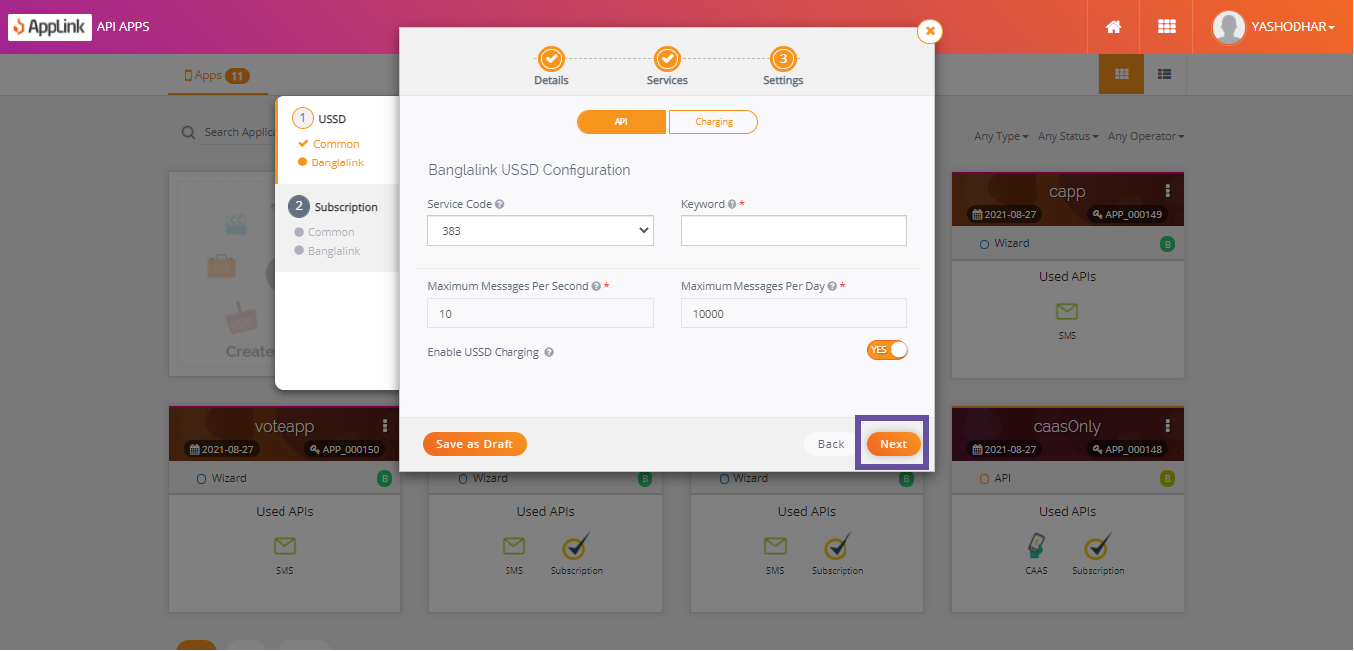
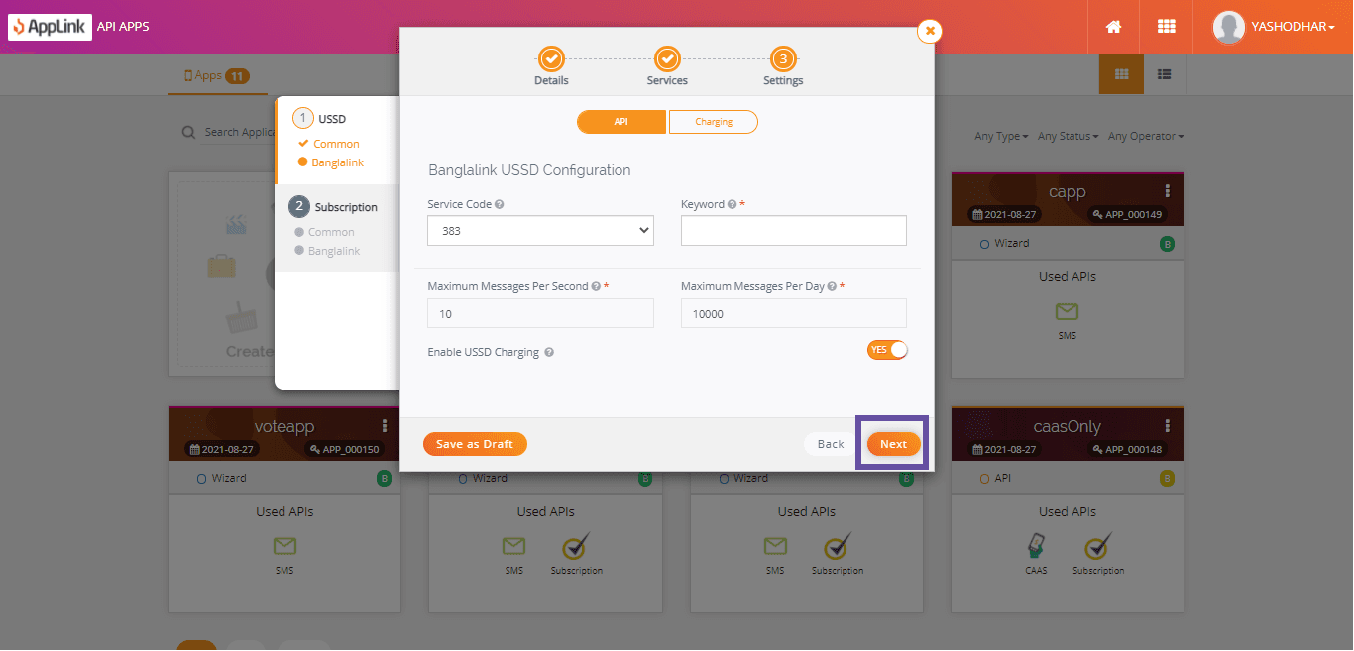
Step 10: Fill in the USSD configuration details and click Next.
Step 11: Fill in the USSD charging details and click Next.
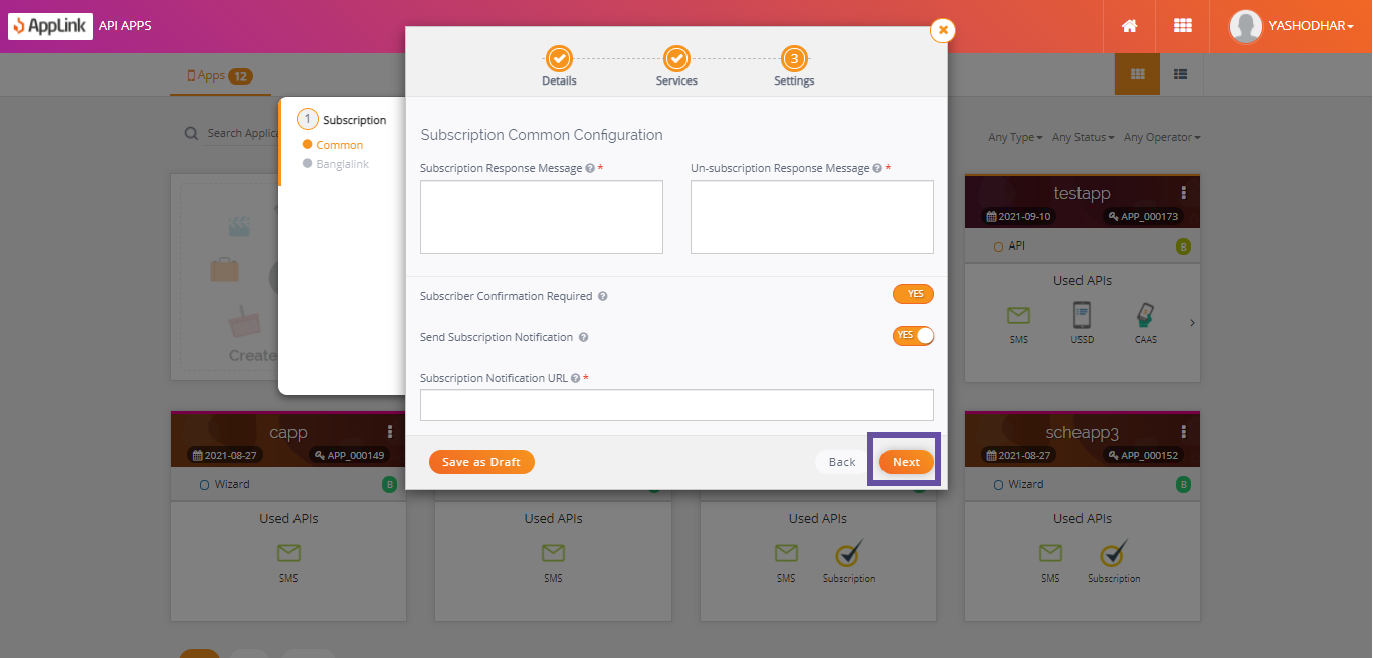
Step 12: Fill in the Subscription common configuration details and click Next.
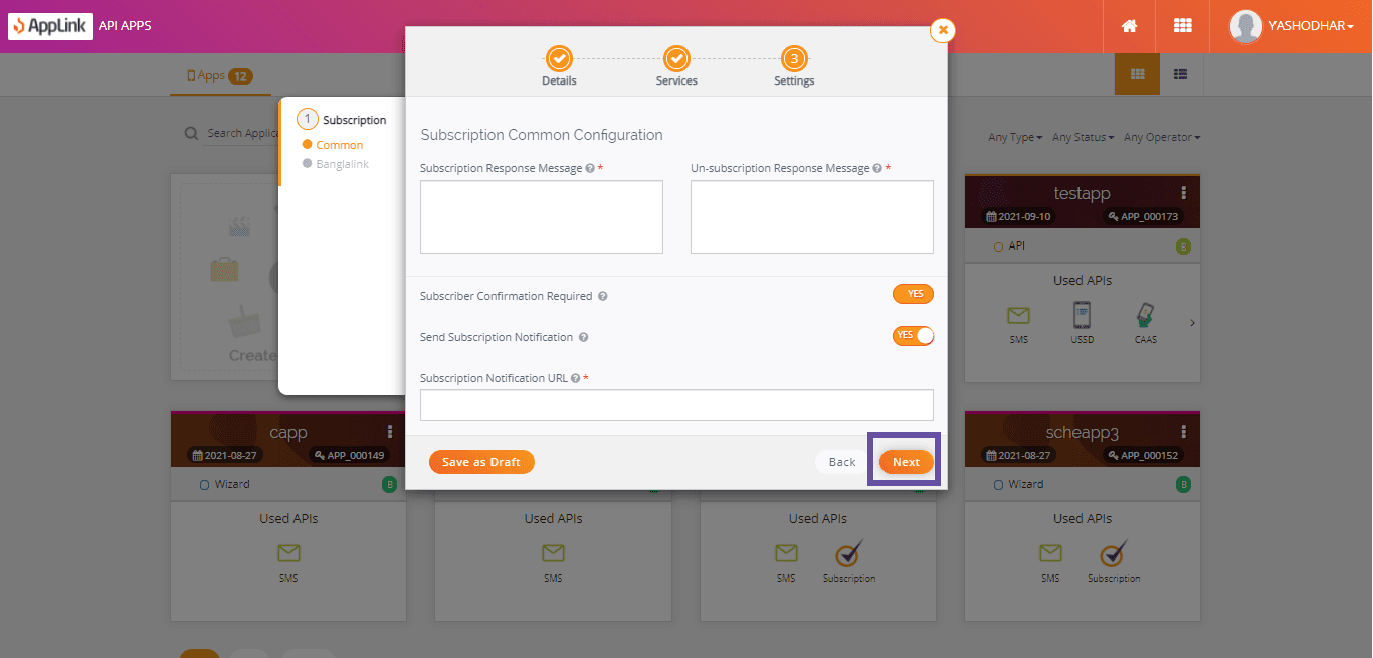
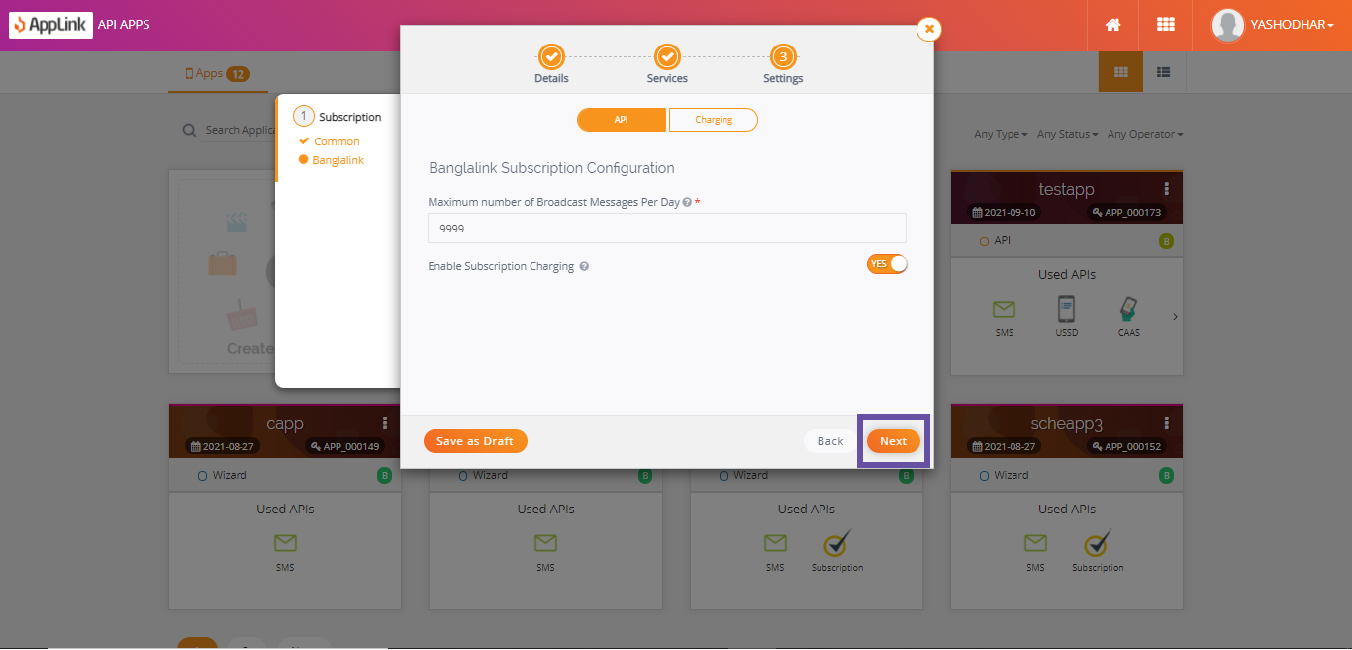
Step 13: Fill in the Subscription configuration details and click Next.
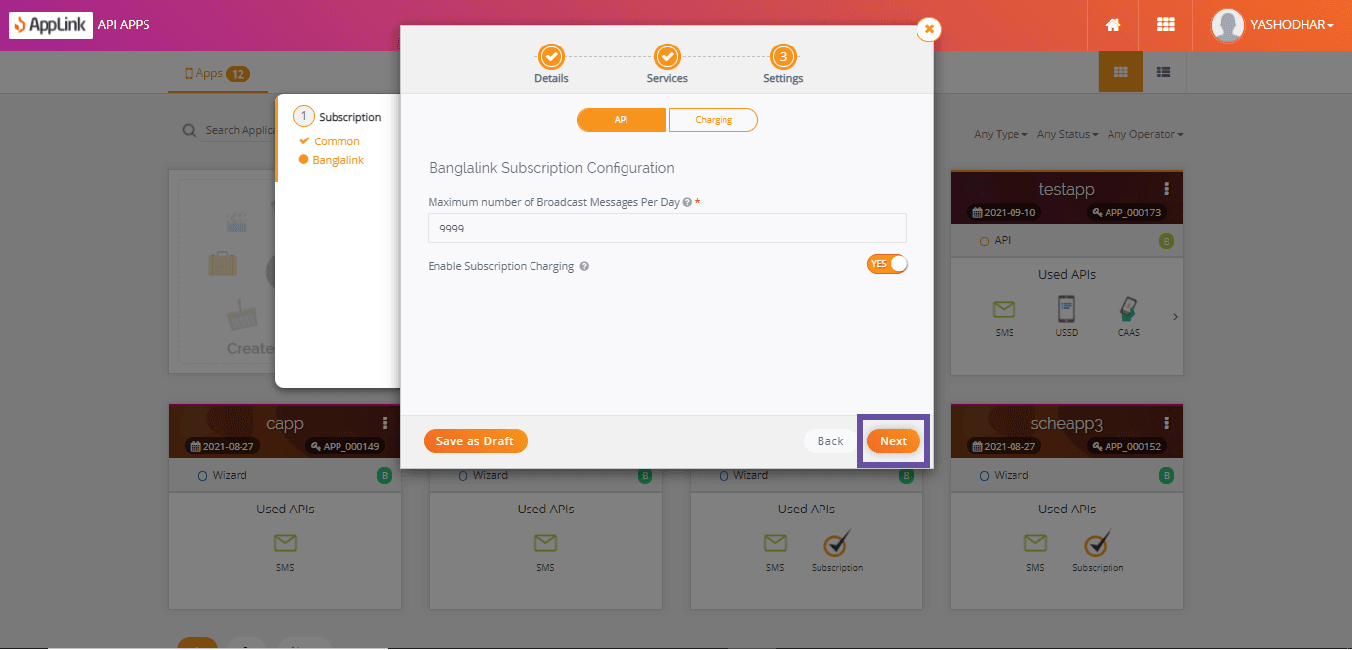
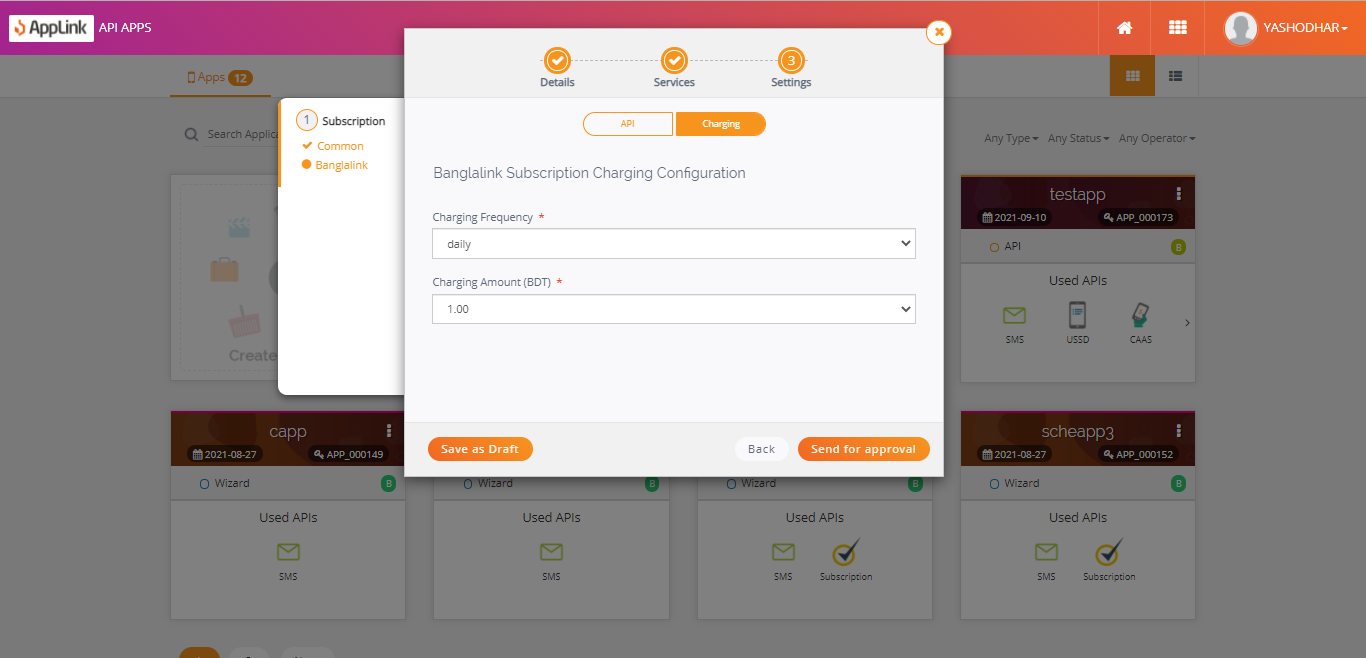
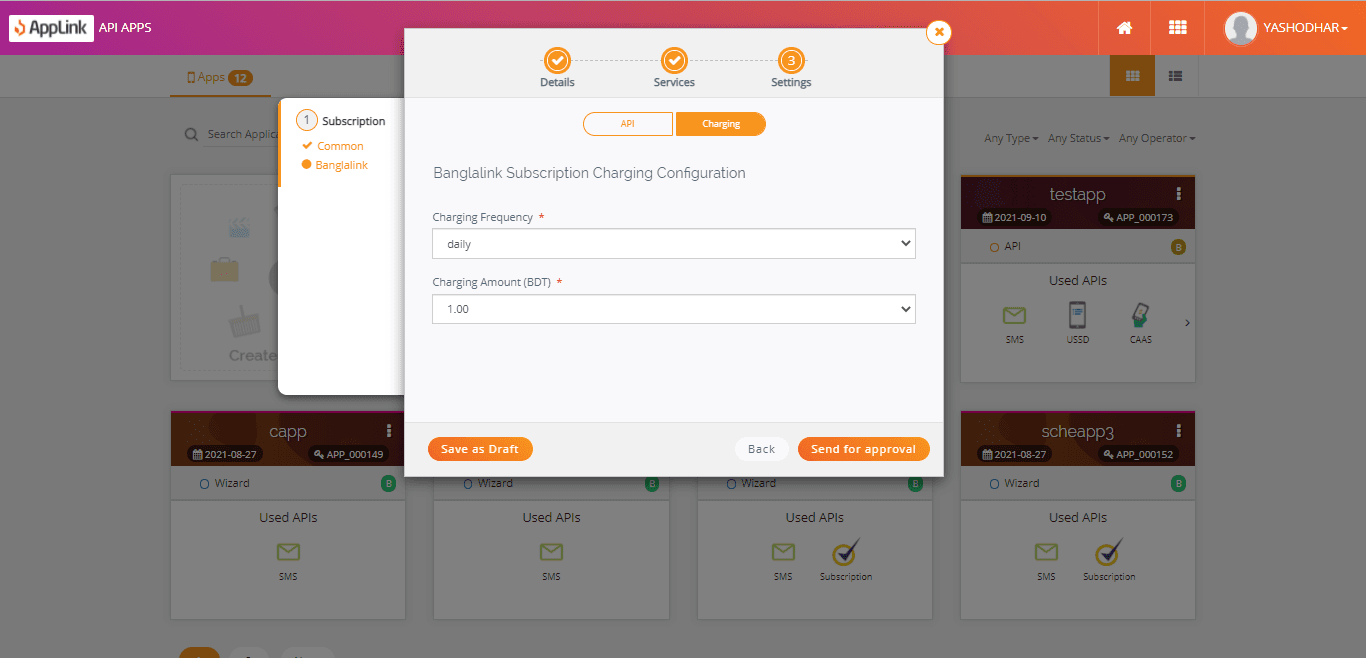
Step 14: Fill in the Subscription charging details.
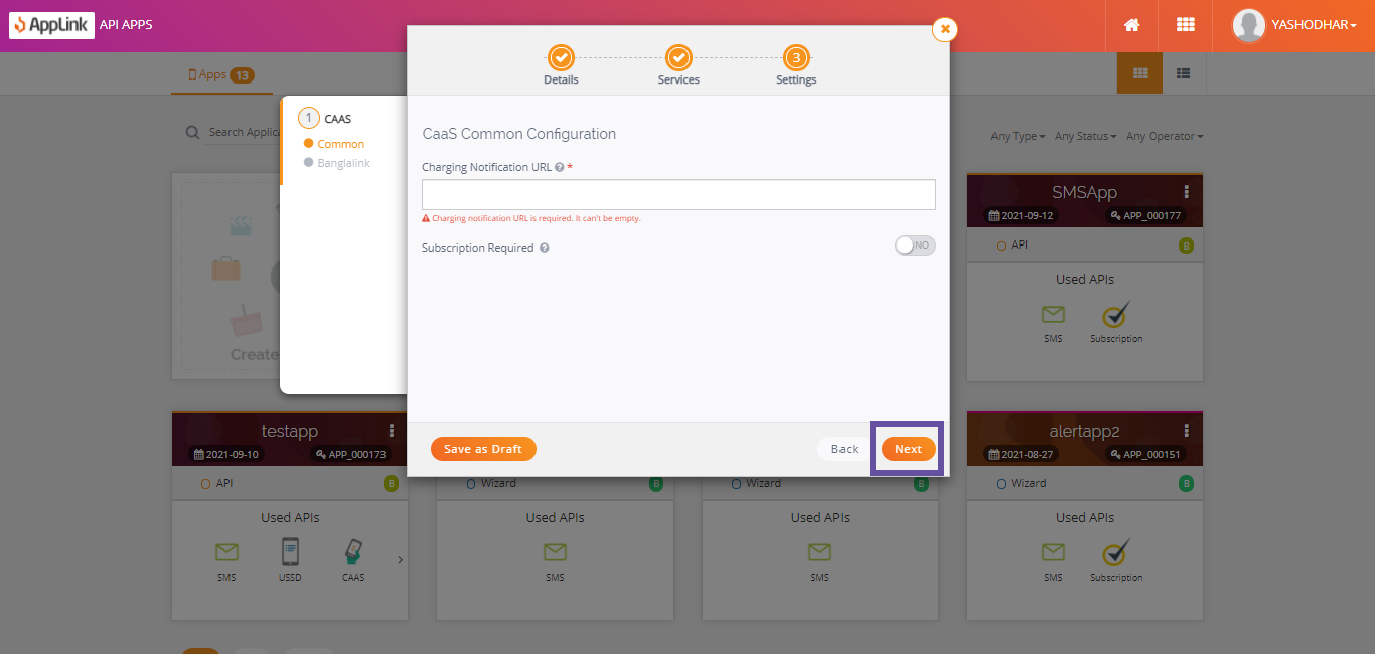
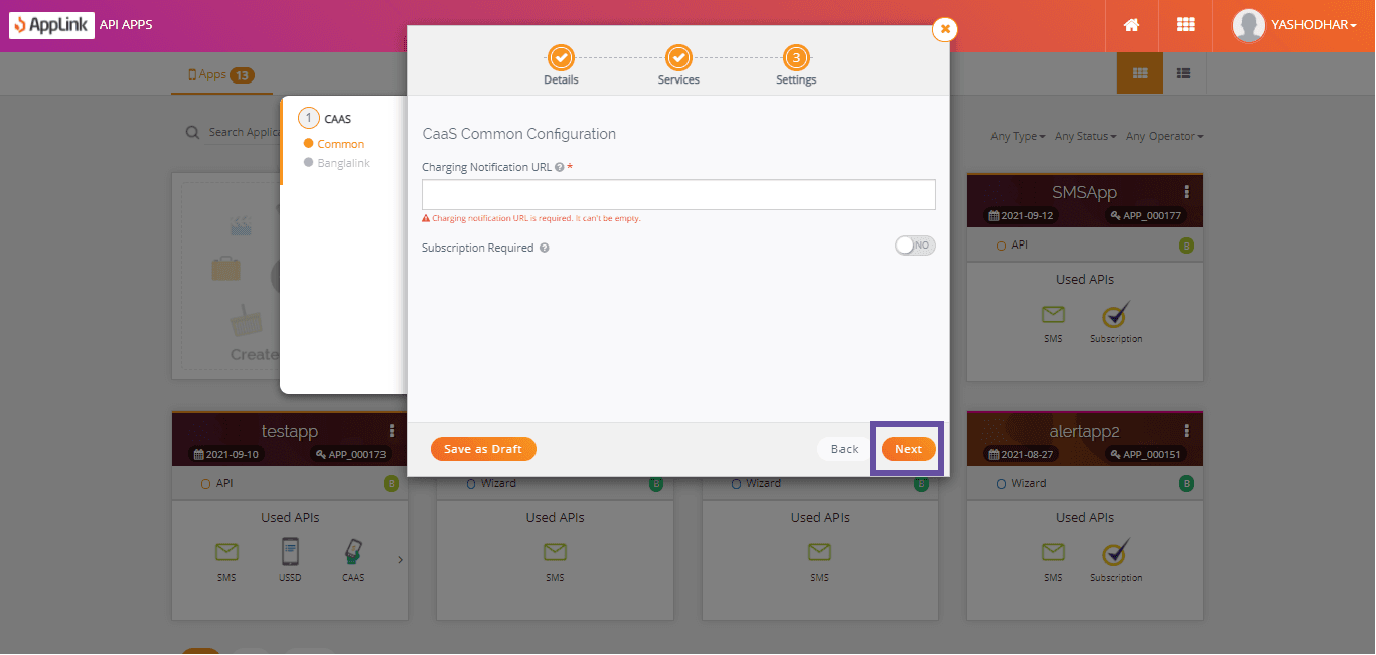
Step 15: Fill in the CaaS common configuration details and click Next.
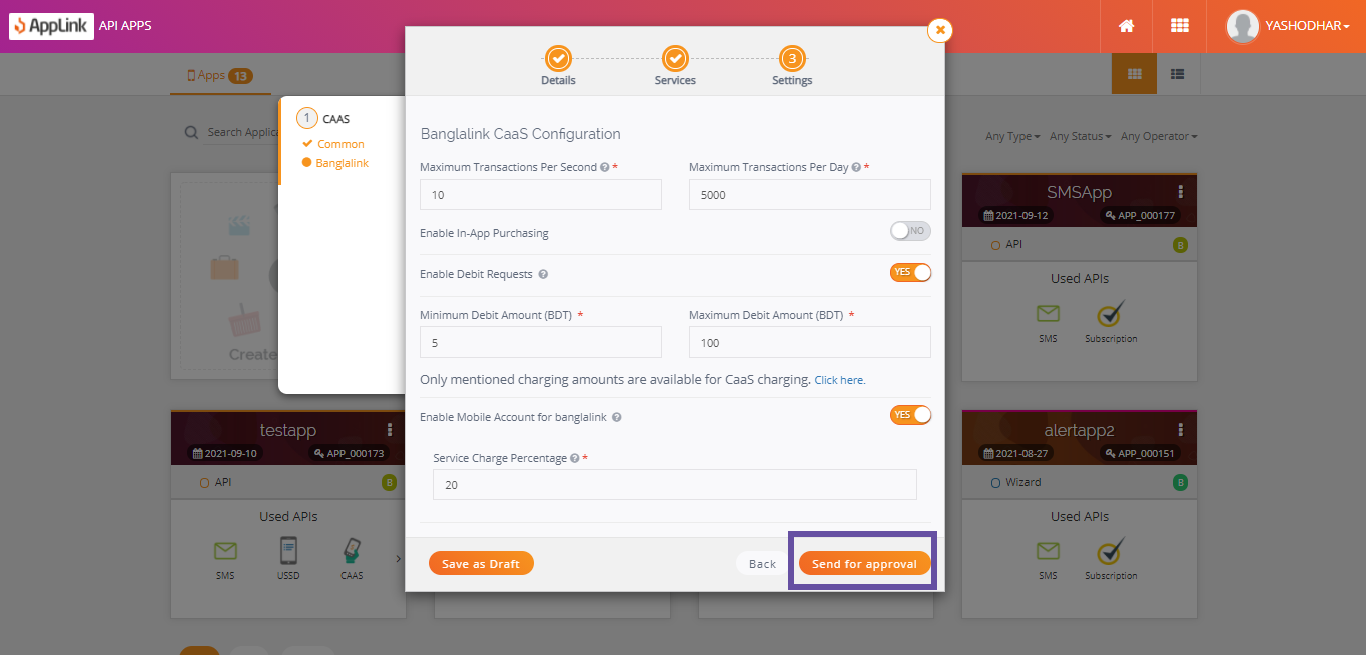
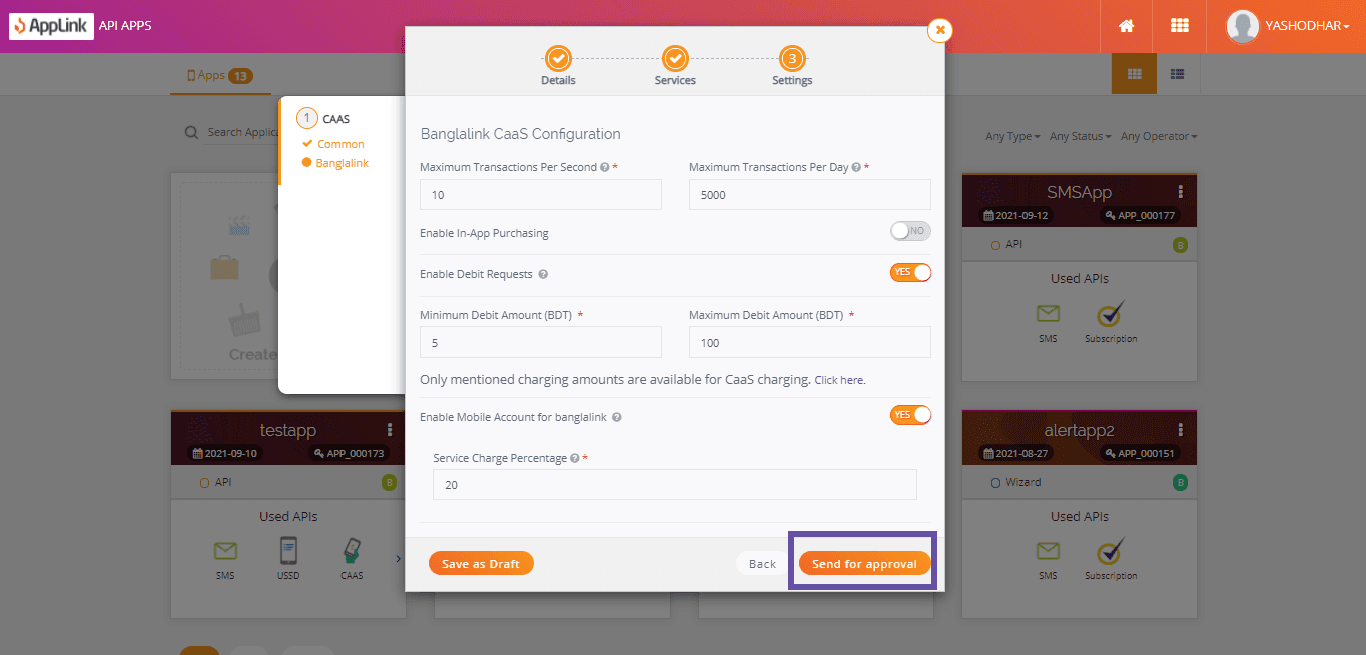
Step 16: Fill in the CaaS configuration details and send the application for approval.
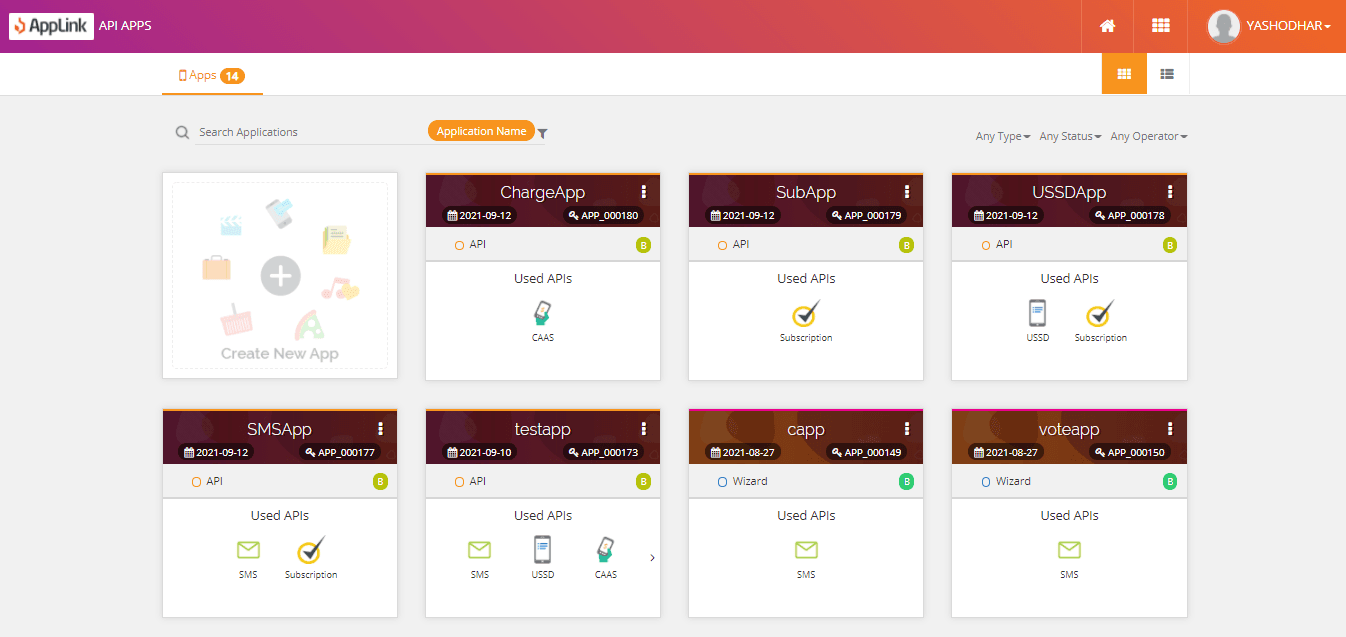
Step 17: View your created applications.